
Takeaway:
A punch list is the final inspection checklist used in remodeling to confirm that all work is complete, functional, and meets the agreed-upon standard before the homeowner releases final payment.
If your contractor says your remodel is “done,” but you haven’t completed a punch list, the job is not finished yet — regardless of how good it looks on the surface.
The punch list is your last line of quality control and financial leverage, typically tied to the final 10% payment hold-back in your contract.
What Is a Punch List in Home Remodeling?
In residential remodeling, a punch list is a written list of incomplete, defective, or unsatisfactory items identified during the final walkthrough of a project.
Its purpose is to:
- Verify workmanship quality
- Confirm systems function correctly
- Ensure the scope of work matches the contract
- Require corrections before final payment is released
A punch list is not about nitpicking. It is standard professional procedure used to close out construction projects properly.
Without a punch list, homeowners are relying on appearance instead of verification — and that’s where costly problems slip through.
Why a Punch List Matters Before Final Payment
As a project nears completion, contractors are often under pressure to move crews to the next job. That’s when:
- Small defects are overlooked
- Finishing details are rushed
- “Good enough” replaces “done right”
Industry data consistently shows that many remodeling projects experience delays or cost overruns. In the final stretch, unfinished or substandard work is easy to miss unless it’s systematically checked.
Rebo’s Remodeling Rules explains why all remodel contracts should include a 10% final payment hold-back. That hold-back gives the homeowner leverage to ensure corrections are made before the project is officially closed.
Once final payment is released, your leverage drops sharply.
How to Use a Punch List Effectively
A punch list only works if it’s structured and documented. Here’s how professionals use it:
1. Start Early
Begin noting issues before the project ends. Minor concerns — paint flaws, trim gaps, misalignments — are easier to track when they’re fresh.
2. Schedule a Final Walkthrough
Conduct the walkthrough one to two days before final payment is due. Inspect in good lighting, with all systems running.
3. Document Everything
List each item clearly and mark it as Passed or Failed. Photograph failed items to create a clear record.
4. Review With the Contractor
Share the punch list and set a firm deadline for corrections. Final payment should remain on hold until all items are resolved.
5. Re-Inspect and Sign Off
Verify that corrections are complete. Both parties should sign off on the final punch list and retain a copy.
It’s not done, until YOU say it’s DONE!
Your contractor says your $25,000 kitchen is “done.” The paint’s dry, the fridge hums, and the backsplash gleams—but something doesn’t feel finished. And that’s because it might not be. Before you release the final 10% payment—often a $2,500 chunk—your last tool for leverage is the punch list.
A punch list is your final quality control checklist, confirming that all work is complete, functional, and up to standard. It’s not about nitpicking—it’s about protecting your investment. It’s also standard procedure in professional remodeling. Without it, you’re gambling that what looks good today won’t fail tomorrow.
Common Punch List Items
The Punch List included in our Planner System highlights some common areas to inspect:
- Cabinetry & Hardware: Check for alignment, smooth operation, and secure hardware.
- Tile Work: Look for even grout lines and the absence of hollow-sounding tiles.
- Plumbing: Run faucets and appliances—check for leaks and full functionality.
- Lighting & Electrical: Test every switch, outlet, and GFCI reset.
- Finishing Details: Scrutinize paint lines, caulking, and trim. Cleanliness counts, too.
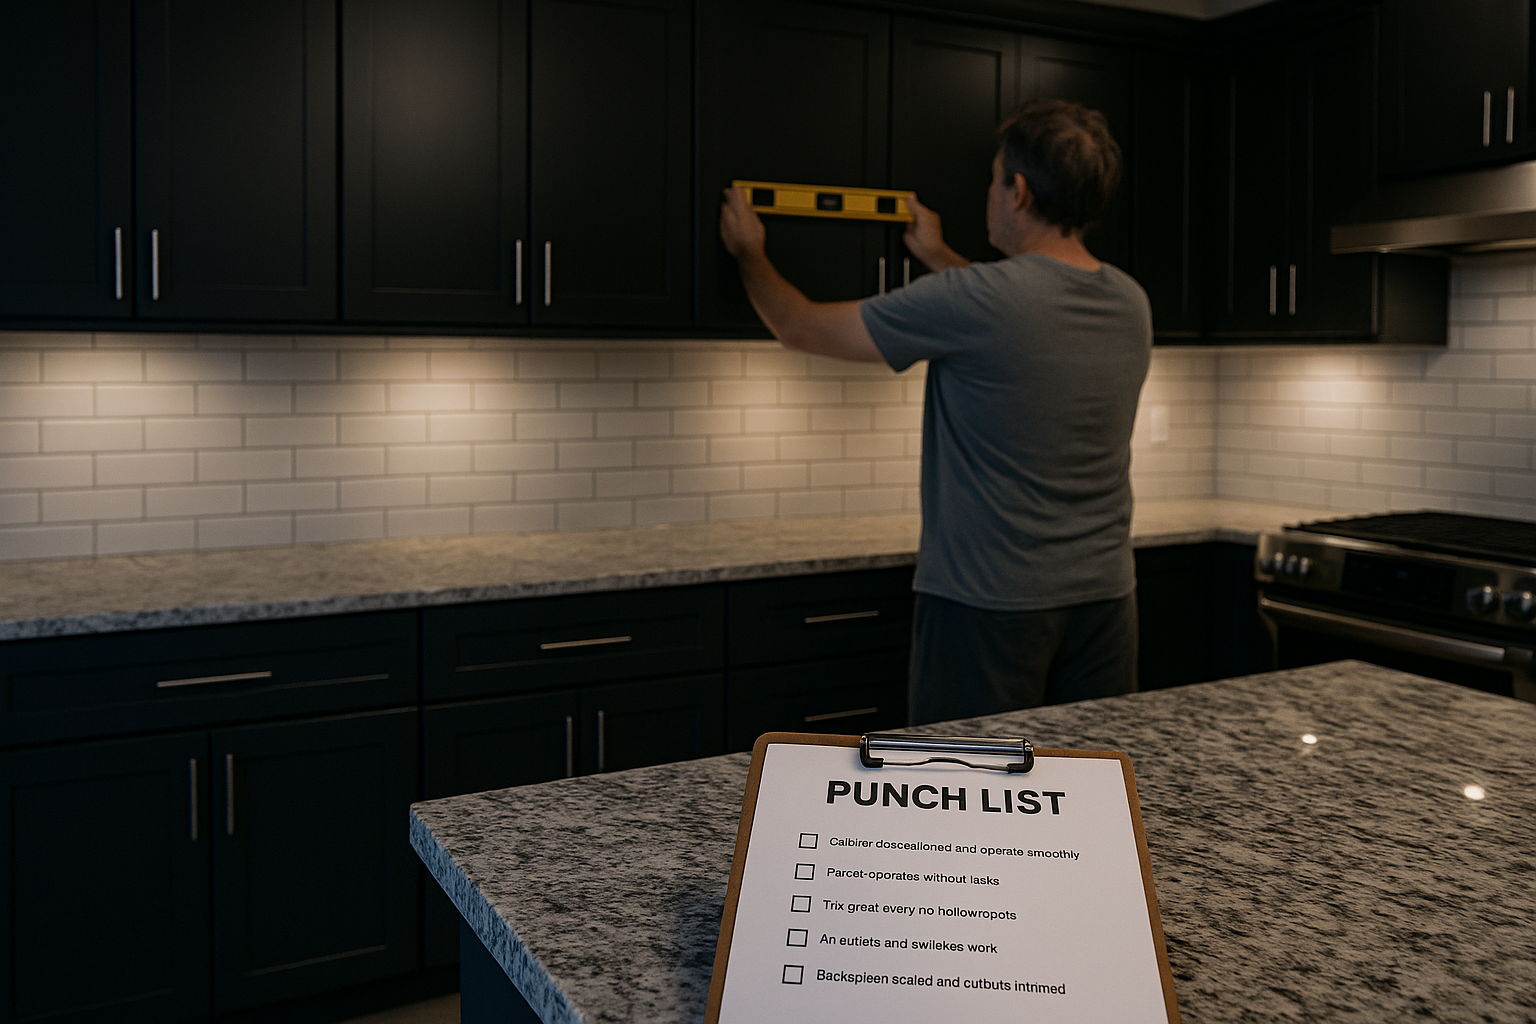
Sample Punch List Grid (for Word):
| Inspection Item | Inspected | Passed | Failed |
|---|---|---|---|
| Cabinet doors aligned and operate smoothly | ☐ | ☐ | ☐ |
| Faucet operates without leaks | ☐ | ☐ | ☐ |
| Tile grout even, no hollow spots | ☐ | ☐ | ☐ |
| All outlets and switches work | ☐ | ☐ | ☐ |
| Backsplash sealed and cutouts trimmed | ☐ | ☐ | ☐ |
This simple checkbox table helps organize your walkthrough and ensures nothing gets overlooked.
Final Payment = Final Sign-Off
Don’t let your remodel be “done” until you say it is. Hold the last 10% until every item on your list has passed inspection and your contractor has signed off. This is how professionals protect their budgets – and now, so can you.
Deeper Dive: RemodX has developed a great free punch list you can download and start using immediately (it’s also a great tool for planing your remodel at the earliest stages. More tailored punch lists for kitchen, bath, garage remodels and more are included in each RemodX Remodel Planning System.
A punch list is a final inspection checklist used to identify incomplete, defective, or unsatisfactory work before a remodeling project is officially completed and final payment is released.
A punch list is a final inspection checklist used to identify incomplete, defective, or unsatisfactory work before a remodeling project is officially completed and final payment is released.
While not legally required in all contracts, a punch list is a standard professional practice. Releasing final payment without a completed punch list significantly reduces the homeowner’s leverage to have issues corrected.
Most remodeling contracts use a 10% final payment hold-back. This amount is typically sufficient to ensure the contractor completes all punch list items before the project is closed.
A contractor should correct punch list items that fall within the agreed scope of work and quality standards. Disputes usually arise when expectations were not clearly documented in the contract or specifications.
Punch list items commonly include:
- Finish defects (paint, trim, caulking)
- Cabinet or door alignment issues
- Tile and grout problems
- Plumbing leaks or improper operation
- Electrical outlets, switches, or fixtures that do not function correctly
Yes. Punch list items should always be documented in writing and supported with photos when possible. Written documentation protects both the homeowner and contractor and helps prevent disputes.
Once all punch list items are corrected and verified, both parties sign off on the list. Final payment is then released, officially closing out the project.